Picnic Table PDF Plans: A Comprehensive Guide
Discover the joy of outdoor dining with expertly crafted picnic tables! Explore detailed PDF plans, unlocking a world of designs – from classic A-frames to unique hexagonal options.
Build lasting memories with a personalized picnic space, utilizing free and premium plans for all skill levels, ensuring a perfect fit for your needs.
Embarking on a DIY picnic table project is a rewarding experience, blending craftsmanship with the promise of outdoor enjoyment. Picnic table plans, particularly those in PDF format, offer a structured pathway to achieving this goal. These plans aren’t merely instructions; they represent a gateway to creating a personalized outdoor haven for family and friends.
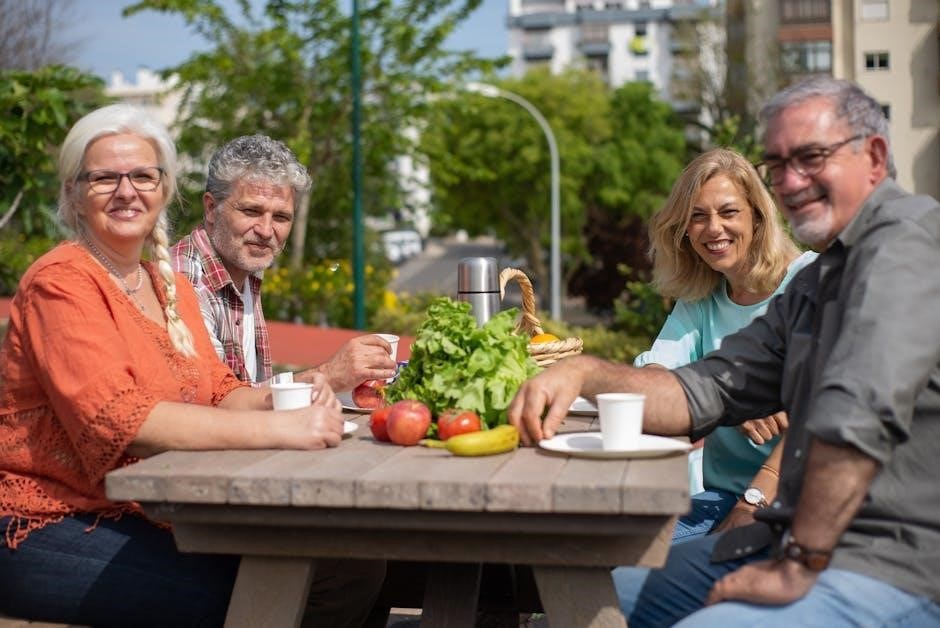
From simple A-frame designs to more elaborate hexagonal structures, the variety available is extensive. PDF plans provide clarity, detail, and often, a bill of materials, streamlining the construction process. Consider the Ferris community’s gatherings, highlighting the social aspect a picnic table fosters. Whether you’re a seasoned woodworker or a beginner, a well-chosen plan ensures success, transforming lumber into a cherished outdoor fixture.
Why Use PDF Plans for Building a Picnic Table?
PDF plans offer unparalleled convenience and accuracy for picnic table construction. Unlike fragmented online tutorials, a PDF consolidates all necessary information – cutting lists, assembly diagrams, and material requirements – into a single, easily accessible document. This eliminates confusion and reduces the risk of errors during building.
Print-friendly formats, as noted in available resources, allow for on-site referencing without relying on devices. Furthermore, the detailed nature of these plans, covering all construction aspects, empowers builders of all skill levels. Imagine creating a covered picnic table, suitable for all weather, as described in available designs, with confidence and precision, thanks to a comprehensive PDF guide.
Types of Picnic Tables You Can Build from PDF Plans
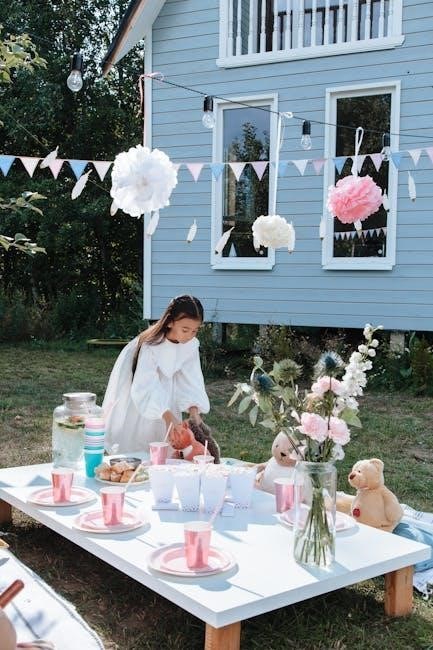
PDF plans unlock a diverse range of picnic table styles, catering to various preferences and spaces. Traditional A-frame designs remain popular for their classic aesthetic and sturdy construction, readily available in numerous plans. For a unique touch, consider round picnic tables, offering a more intimate gathering space.
More elaborate options, like hexagonal picnic tables, provide ample seating and a distinctive visual appeal. Some plans even incorporate features like detached benches for easy access or covered roofs for all-weather enjoyment. The possibilities are vast, allowing you to build a picnic table perfectly suited to your garden or outdoor area.
Traditional A-Frame Picnic Tables
A-frame picnic tables represent the quintessential outdoor dining experience, and numerous PDF plans cater to this timeless design. These plans typically feature a robust, angled leg structure providing exceptional stability. Construction generally involves straightforward cuts and assembly, making them ideal for beginner to intermediate builders.
PDFs often detail variations in tabletop size and bench configurations, allowing for customization. Expect clear diagrams illustrating the frame construction and bench attachment. Materials commonly include pressure-treated lumber for durability, ensuring resistance to the elements. The simplicity and practicality of A-frame tables make them a consistently popular choice.

Round Picnic Tables
Round picnic tables offer a unique and sociable dining experience, diverging from the traditional rectangular design. PDF plans for these tables often present a greater construction challenge, requiring more precise cuts and joinery. They typically involve creating a circular tabletop from individual boards, demanding careful alignment.
Support structures can vary, ranging from a central pedestal base to multiple angled legs. Detailed plans will illustrate the construction of the curved tabletop and the attachment of benches, often segmented to follow the circular form. While more complex, round tables provide a distinctive aesthetic and encourage communal seating.
Hexagonal Picnic Tables
Hexagonal picnic tables represent a more advanced building project, offering a visually striking alternative to standard designs. PDF plans for these tables necessitate accurate angle cuts and precise assembly to achieve the six-sided shape. The tabletop construction involves joining multiple boards at 60-degree angles, demanding careful measurement and alignment.
Leg and frame designs must complement the hexagonal form, often utilizing angled supports for stability. Detailed plans will guide you through creating the unique geometry and attaching benches that conform to the table’s shape. While challenging, a hexagonal table provides ample seating and a distinctive focal point for any outdoor space.
Essential Tools and Materials
Successfully constructing a picnic table from PDF plans requires a focused selection of tools and materials. Essential tools include a saw (circular or hand), a drill with various bits, a measuring tape, a level, and safety glasses. Fasteners like screws, bolts, and nails are crucial; galvanized or stainless steel are recommended for weather resistance.
Lumber selection is paramount – pressure-treated pine offers affordability and rot protection, while cedar provides natural durability and aesthetic appeal. Consider the plan’s specifications for lumber dimensions and quantities. Having these materials readily available streamlines the building process, ensuring a smooth and enjoyable experience.
Lumber Selection: Pressure-Treated vs. Cedar
Choosing the right lumber is vital for a durable picnic table. Pressure-treated pine is a cost-effective option, chemically treated to resist rot, decay, and insects – ideal for ground contact. However, it requires careful handling and disposal due to the chemicals involved.
Cedar, conversely, is naturally resistant to these elements, offering a beautiful aesthetic and a pleasant aroma. While more expensive upfront, cedar requires less maintenance and is environmentally friendly. Consider your budget, desired lifespan, and environmental concerns when making your selection, ensuring a lasting and enjoyable outdoor addition.
Fasteners: Screws, Bolts, and Nails
Selecting appropriate fasteners is crucial for a sturdy picnic table. Screws offer excellent holding power and are generally preferred for most connections, especially when working with pressure-treated lumber. Bolts provide superior strength for critical joints like leg-to-frame connections, resisting shear forces.
Nails, while faster to install, offer less holding power and are best suited for non-structural elements. Always use fasteners rated for outdoor use – galvanized or stainless steel – to prevent rust and corrosion. Ensure proper sizing and pre-drilling to avoid splitting the wood, guaranteeing a safe and durable build.
Tools Required: Saw, Drill, Measuring Tape, etc.
Successfully building a picnic table demands a well-equipped toolkit. A circular saw or hand saw is essential for accurate lumber cuts. A drill, with various bits, handles pilot holes and fastener installation. Measuring tape and a square ensure precise dimensions and angles.
Safety gear – including safety glasses and gloves – is non-negotiable. A level guarantees a stable tabletop. Sandpaper or a sander prepares surfaces for finishing. Consider a clamping system to hold pieces securely during assembly, improving accuracy and safety throughout the construction process.
Finding Free Picnic Table PDF Plans Online
Numerous websites offer free picnic table PDF plans, catering to diverse skill levels and design preferences. Web searches using keywords like “free picnic table plans PDF” yield abundant results. Popular platforms include woodworking forums, DIY websites, and online repositories of building plans.
Be cautious when downloading plans; verify the source’s credibility. Look for plans with clear diagrams, detailed cutting lists, and comprehensive assembly instructions. Remember to check user reviews or comments for feedback on plan accuracy and ease of construction before commencing your project.
Analyzing a Picnic Table PDF Plan
Before starting construction, thoroughly analyze the picnic table PDF plan. Begin with the Bill of Materials, verifying you understand all required lumber, fasteners, and quantities. Next, scrutinize the Cutting List, ensuring accurate measurements and minimizing wood waste. Pay close attention to lumber dimensions and angles.
Carefully interpret the Assembly Diagrams, visualizing each step. Confirm you comprehend the joinery techniques and the overall structural integrity of the design. Identify potential challenges or areas requiring extra attention. A detailed plan analysis prevents costly errors during building.
Understanding the Bill of Materials
The Bill of Materials (BOM) is your shopping list for the picnic table project. It meticulously details every component needed, specifying lumber type, dimensions (length, width, thickness), and quantity. Expect to see entries for pressure-treated lumber or cedar, screws, bolts, and potentially nails.
Carefully review each item, noting the required amount. Pay attention to lumber grades – higher grades offer better durability. Ensure you understand fastener sizes and types. A complete BOM prevents mid-project trips to the hardware store, streamlining your build and saving valuable time;
Decoding the Cutting List
The cutting list is a crucial component of your PDF plan, dictating how to efficiently utilize your lumber. It breaks down each piece required for the picnic table, specifying the exact dimensions needed – length, width, and quantity. Understanding this list minimizes waste and ensures accurate cuts.
Pay close attention to units (inches or millimeters) and double-check measurements before cutting. Some plans may include diagrams illustrating cutting layouts. Efficient planning here saves both lumber and effort, leading to a smoother construction process and a beautifully crafted picnic table.
Interpreting the Assembly Diagrams
Assembly diagrams are the visual roadmap for bringing your picnic table to life. They illustrate the sequence of joining the cut pieces, often using exploded views to show component relationships. Carefully study these diagrams before starting, identifying each part and its orientation.

Look for details like screw or bolt placement, and any specific joinery techniques required. Pay attention to arrows indicating direction and ensure you understand the order of operations. Clear diagrams are essential for avoiding errors and achieving a structurally sound and aesthetically pleasing picnic table.
Step-by-Step Construction Guide (Based on Common Plans)
Embark on your picnic table build by first preparing your workspace and gathering all necessary tools and materials. Begin with the tabletop, assembling the boards according to the plan’s specifications, ensuring a flush and secure surface. Next, construct the legs and frame, paying close attention to angles and stability.
Attach the benches, verifying alignment and proper support. Throughout the process, regularly check measurements and use clamps to hold pieces in place while fastening. Remember to prioritize safety and follow the plan’s instructions meticulously for a successful outcome.
Building the Tabletop
Start by carefully selecting and preparing your lumber, ensuring it’s cut to the precise dimensions outlined in your chosen PDF plan. Lay out the tabletop boards side-by-side, checking for any warping or imperfections. Apply wood glue along the edges of each board, then clamp them tightly together.
Secure the boards with screws or nails, spacing them evenly for optimal strength and stability. Once the glue is dry, sand the tabletop smooth, removing any rough edges or splinters. Finally, consider adding a protective finish to enhance durability and weather resistance.
Constructing the Legs and Frame
Begin by cutting the leg pieces according to your PDF plan’s specifications, ensuring accurate angles for stability. Assemble the frame using sturdy lumber, employing screws and wood glue for a robust connection. Reinforce the corners with metal brackets if desired, adding extra support.

Attach the legs to the frame, verifying they are plumb and square. Consider adding cross braces between the legs for increased rigidity, especially for larger tables. Sand all surfaces smooth, preparing them for attachment to the tabletop and subsequent finishing.
Attaching the Benches
Carefully position the benches alongside the table frame, ensuring proper alignment and equal spacing. Secure the benches using heavy-duty screws or bolts, pre-drilling holes to prevent wood splitting. Reinforce the connections with wood glue for added durability and stability.
Double-check that the benches are level and firmly attached before applying any finishing touches; Consider adding additional support brackets underneath the benches for increased weight capacity. Smooth any rough edges or protruding screws for safety and comfort, completing the seating arrangement.
Finishing Touches: Sanding and Sealing
Begin with a thorough sanding of the entire picnic table, starting with coarser grit sandpaper and progressing to finer grits for a smooth surface. Remove all dust and debris before applying a protective sealant. Choose a sealant appropriate for outdoor use, such as spar urethane or a penetrating oil.
Apply several coats of sealant, allowing each coat to dry completely before applying the next. This will protect the wood from the elements and enhance its natural beauty. Inspect for any imperfections and touch up as needed, ensuring a long-lasting and attractive finish.
Modifications and Customizations
Elevate your picnic table with personalized modifications! Consider adding a hole for a patio umbrella, providing welcome shade during sunny days. Incorporate backrests for enhanced comfort, especially for extended seating. Adjust the dimensions to suit your specific space and needs – perhaps a smaller table for a cozy balcony.
Explore creative options like built-in storage or unique paint finishes. Remember to adjust your PDF plans accordingly when making alterations, ensuring structural integrity. These customizations transform a standard picnic table into a truly unique and functional outdoor feature.
Adding a Umbrella Hole
Enhance your picnic table’s usability by incorporating an umbrella hole! Carefully select a central location on the tabletop within your PDF plans. Use a hole saw attachment for your drill, choosing a diameter slightly larger than your umbrella pole. Ensure the hole is smooth to prevent snagging and protect the umbrella.
Reinforce the area around the hole with a metal grommet or a wooden ring for added durability. Consider the table’s structural integrity when modifying the plans; avoid compromising support. This simple addition provides essential shade, making your picnic table a comfortable retreat even on the brightest days.
Incorporating Backrests
Elevate your picnic table’s comfort by adding backrests! Review your chosen PDF plans for compatibility or modification options. Construct backrest frames from sturdy lumber, ensuring they align with the bench seats. Attach the frames securely to the bench supports using screws and wood glue for stability.

Consider angled backrests for ergonomic support, and smooth all edges to prevent discomfort. Customize the height and style to suit your preferences. Adding backrests transforms a simple picnic table into a relaxing lounge area, perfect for extended outdoor enjoyment and comfortable gatherings.
Adjusting Dimensions for Different Needs
Tailor your picnic table to perfectly fit your space and family size! PDF plans often allow for dimensional adjustments. Carefully recalculate lumber quantities when altering length, width, or height. Consider smaller dimensions for compact patios or larger sizes for big gatherings.
Ensure structural integrity by maintaining proportional relationships between components. Adjusting bench lengths impacts tabletop size; modifying leg height affects overall stability. Always double-check your calculations and cutting lists before proceeding. A customized picnic table enhances functionality and blends seamlessly with your outdoor environment.
Safety Precautions During Construction
Prioritize safety throughout the picnic table building process! Always wear safety glasses to protect your eyes from flying debris. Utilize gloves to prevent splinters and hand injuries. Ensure a stable work surface and secure lumber before cutting or drilling.
Be mindful of power tool safety guidelines; disconnect tools when changing blades or bits. Work in a well-ventilated area, especially when applying finishes. Seek assistance when lifting heavy components. Proper safety practices guarantee a fun and injury-free building experience, resulting in a beautiful and safe picnic table.
Maintaining Your Picnic Table
Preserve your handcrafted picnic table with regular maintenance! Annually inspect for loose screws or bolts, tightening as needed. Clean the surface with mild soap and water to remove dirt and grime. Reapply a protective sealant or stain every one to two years to guard against weathering.
Consider covering the table during harsh winter months to prevent damage from snow and ice. Promptly address any signs of rot or decay. Consistent care extends the life of your picnic table, ensuring years of enjoyment for family and friends in your outdoor space.
Troubleshooting Common Issues
Encountering wobbles? Check leg stability and tighten all connections. Addressing splintering wood requires sanding and resealing. For stubborn stains, use a wood cleaner specifically designed for outdoor furniture. If a bench feels unstable, reinforce the supports with additional screws or brackets.
Prevent future issues by regularly inspecting for wear and tear. Minor cracks can be filled with wood filler before resealing. Remember, proper maintenance, as outlined in your PDF plans, significantly reduces the likelihood of encountering these common problems, guaranteeing a lasting picnic experience.
Where to Purchase Premium Picnic Table Plans
Numerous online marketplaces offer detailed, premium picnic table plans. Websites like Etsy and specialized woodworking plan retailers provide a vast selection, often exceeding free options in detail and design variety. Expect to find plans with enhanced diagrams, comprehensive material lists, and even video tutorials.
Consider platforms offering customer support for plan-related questions. Investing in premium plans can save time and frustration, especially for complex designs. Look for plans tailored to your skill level and desired aesthetic, ensuring a successful and enjoyable building experience. Remember to check reviews before purchasing!
Picnic Table Plans for Specific Skill Levels (Beginner, Intermediate, Advanced)

Beginner plans typically feature simple A-frame designs with straightforward assembly, utilizing basic tools and readily available lumber. Intermediate plans introduce more complex joinery, like angled supports or curved elements, requiring moderate woodworking experience. Advanced plans showcase intricate designs – hexagonal tables, those with built-in coolers, or detailed backrests – demanding proficient skills.
Carefully assess your abilities before selecting a plan. Starting with a beginner project builds confidence, while tackling an advanced plan without sufficient experience can lead to frustration. Many plan providers categorize their offerings by skill level, ensuring a suitable match for your expertise.
Community Picnic Table Projects & Events
Engage in collaborative building projects! Many communities organize events where volunteers construct picnic tables for parks, schools, or public spaces, fostering a sense of shared accomplishment. Founders Day celebrations, like those at Ferris State University, often include community gatherings and picnics.
Utilize picnic table plans as a focal point for team-building activities or fundraising initiatives. Bulldog picnics demonstrate the power of communal dining. Consider donating completed tables to local organizations or hosting a “build-a-table” workshop. These events strengthen community bonds and provide functional outdoor amenities.
Resources for Additional Information and Support
Numerous online forums and woodworking communities offer valuable advice and troubleshooting assistance for picnic table builders. Seek guidance from experienced craftspeople and share your progress with fellow enthusiasts. Explore websites dedicated to DIY projects and outdoor furniture construction for inspiration and detailed tutorials.
Local hardware stores and lumberyards can provide expert advice on material selection and fastening techniques. Don’t hesitate to ask questions and seek clarification on plan details. Utilize online video platforms to access visual demonstrations of construction methods, enhancing your understanding and confidence.

Enjoying Your Handcrafted Picnic Table
Congratulations on completing your picnic table project! Embrace the satisfaction of creating a functional and beautiful addition to your outdoor space. Gather friends and family, and relish countless meals and memories around your handcrafted table.
Remember to maintain your picnic table with regular cleaning and sealing to ensure its longevity. Consider adding personal touches, like cushions or a charming centerpiece, to enhance its appeal. Share your creation with others and inspire them to embark on their own woodworking adventures – a testament to the joy of DIY!