
Nostalgia Ice Cream Maker Manual: A Comprehensive Guide
Dive into the delightful world of homemade frozen desserts! This manual provides everything needed to create rich ice cream, sorbet, or frozen yogurt, offering dessert on demand with minimal effort.
Understanding Your Nostalgia Ice Cream Maker
Welcome to the joy of homemade ice cream! Your Nostalgia Ice Cream Maker is designed to bring back the classic experience of churning your own delicious frozen treats. This isn’t just an appliance; it’s a gateway to creating unforgettable summer memories and enjoying dessert exactly to your liking.
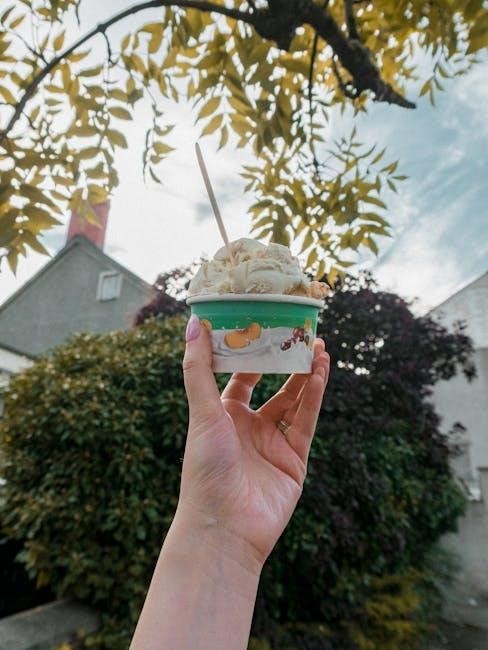
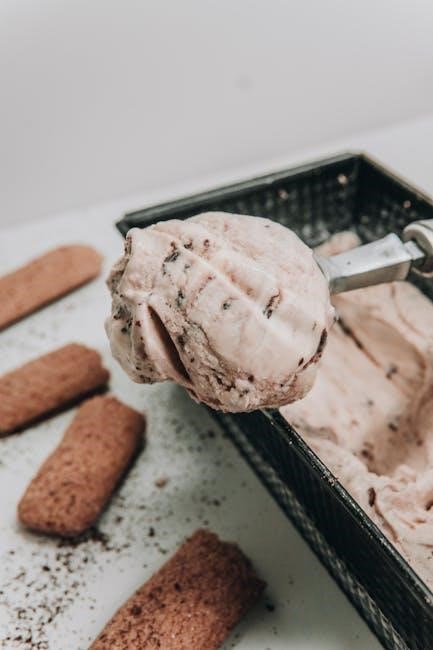
This maker operates on a simple, yet effective principle: a chilled bowl combined with a dasher that continuously mixes and freezes the ice cream base. The wood bucket design evokes a nostalgic charm, reminiscent of traditional ice cream making methods. It’s a fantastic way to involve the whole family in the process, from selecting flavors to enjoying the final product.
Whether you’re craving a classic vanilla, a fruity sorbet, or a creamy frozen yogurt, this machine empowers you to experiment and customize. It’s like having a dessert-on-demand system right in your kitchen, offering a refreshing alternative to store-bought options. Get ready to churn up some happiness!
Key Components and Their Functions
Let’s explore the parts that make the magic happen! Your Nostalgia Ice Cream Maker consists of several key components, each playing a vital role in the freezing process. The freezing bowl, typically made of aluminum, requires pre-chilling for optimal results – this is where the initial freezing takes place.
The dasher, with its rotating blades, continuously mixes the ice cream base, preventing large ice crystals from forming and creating a smooth, creamy texture. The motor housing contains the electric motor that powers the dasher. Ensure it’s securely attached to the freezing bowl during operation.
A lid with an opening is included to allow for adding mix-ins during the churning process. Finally, the instruction manual (that’s this!) provides guidance on assembly, operation, and maintenance. Understanding each component’s function ensures efficient and enjoyable ice cream making.
Safety Precautions Before First Use
Prioritize safety for a worry-free experience! Before operating your Nostalgia Ice Cream Maker, carefully review these precautions. Always ensure the unit is placed on a stable, level surface to prevent accidental tipping. Keep the power cord away from heat sources and sharp edges, avoiding potential damage.
Never immerse the motor housing in water or any other liquid; wipe clean with a damp cloth only. Do not operate the appliance with a damaged cord or plug. If the unit malfunctions, discontinue use immediately and contact customer support.
Supervise children when the ice cream maker is in operation. The freezing bowl gets extremely cold; handle with care, using gloves or a towel to prevent frostbite. Avoid touching the moving dasher blades during the churning process. Proper handling and adherence to these guidelines will ensure safe and enjoyable ice cream making.
Preparing for Ice Cream Making
Get ready to churn! Successful ice cream relies on quality ingredients and proper preparation. Chilling the bowl thoroughly is crucial, alongside a well-mixed, flavorful base.
Gathering Necessary Ingredients
Embarking on your ice cream journey begins with assembling the right ingredients. The foundation of any exceptional ice cream is, of course, dairy – heavy cream is paramount for richness, while milk provides a lighter texture. Granulated sugar sweetens the mixture, but don’t hesitate to experiment with alternatives like caster or even honey for nuanced flavors.
Beyond the basics, vanilla extract is a classic addition, enhancing the overall taste profile. However, the possibilities are truly endless! Consider fresh fruits, chocolate, nuts, or even coffee for unique creations. Remember that the quality of your ingredients directly impacts the final product, so opt for the best you can find.
For sorbets and frozen yogurts, fruit purees or yogurt will take center stage, alongside sugar and a touch of lemon juice to brighten the flavors. Always have your ingredients measured and ready to go before you begin the churning process – this ensures a smooth and efficient ice cream-making experience.
Properly Chilling the Bowl
Achieving the perfect ice cream texture hinges on adequately chilling the freezer bowl. This is arguably the most crucial step in the entire process. The bowl needs to be thoroughly frozen – ideally for a minimum of 16-24 hours, and even longer is recommended for optimal results. Ensure the bowl is placed in the coldest part of your freezer, away from any heat sources.
A properly frozen bowl will remain icy cold throughout the churning process, allowing the ice cream mixture to freeze quickly and evenly. To test if it’s ready, gently shake the bowl; you should hear no liquid sloshing around. If any liquid remains, continue freezing for several more hours.
Do not attempt to use the ice cream maker if the bowl isn’t completely frozen. This will result in a soupy, unfreezable mess. Patience is key! A well-chilled bowl is the secret to creamy, delicious homemade ice cream.
Mixing the Ice Cream Base
Creating a flavorful and smooth ice cream base is fundamental to a successful outcome. Begin with high-quality ingredients – fresh cream, milk, sugar, and your desired flavorings. Combine these in a bowl and whisk vigorously until the sugar is completely dissolved. Avoid grainy textures by ensuring complete dissolution.
For richer results, consider using a custard base, which involves gently heating the cream, milk, and sugar with egg yolks. This creates a thicker, more luxurious texture. However, be careful not to overheat the mixture, as this can cause the eggs to scramble.
Chill the ice cream base for at least two hours, or preferably overnight, before pouring it into the ice cream maker. This allows the flavors to meld and the mixture to become thoroughly cold, further aiding the freezing process. A well-prepared base guarantees a delightful final product.

Operating the Nostalgia Ice Cream Maker
Get ready to transform your chilled base into frozen perfection! This section details the simple steps for assembling, filling, and initiating the churning process for delicious results.
Assembling the Maker
Before you begin the delightful process of ice cream creation, proper assembly is crucial. First, ensure the freezing bowl is thoroughly chilled – this is the foundation of a successful batch. Next, carefully position the dasher assembly within the bowl. The dasher, with its rotating blades, is responsible for incorporating air and creating the creamy texture we all crave.
Secure the motor unit onto the top of the bowl, aligning it correctly to engage the dasher. A gentle click or secure fit usually indicates proper placement. Double-check that all components are stable and firmly connected before proceeding. It’s vital to avoid any wobbling during the churning process, as this could lead to uneven freezing or spills.
Finally, attach the lid, ensuring it’s securely fastened to prevent splattering. Some models may have a specific opening for adding mix-ins later in the churning cycle; familiarize yourself with your model’s features. A properly assembled Nostalgia ice cream maker is the first step towards enjoying homemade goodness!
Pouring in the Ice Cream Mixture
With the Nostalgia ice cream maker correctly assembled, it’s time to introduce the star of the show: your ice cream base! Gently pour the chilled ice cream mixture into the freezing bowl, being careful not to overfill. Leave at least one to two inches of space at the top – this is essential as the mixture expands during the churning process. Overfilling can lead to spillage and a messy cleanup.
Pouring slowly helps prevent splashing and ensures even distribution within the bowl. Once the mixture is in place, securely attach the lid, if it wasn’t already done during assembly. Some models feature an opening for adding mix-ins later; ensure this is accessible if you plan to incorporate chocolate chips, nuts, or fruit.
Remember, the consistency of your mixture significantly impacts the final product. A well-balanced, properly chilled base is key to achieving creamy, delicious ice cream. Now, prepare for the magic to happen!
The Churning Process: Step-by-Step
Now for the exciting part – watching your ice cream come to life! Plug in your Nostalgia ice cream maker and turn it on. The dasher (the paddle inside) will begin to rotate, continuously scraping the frozen bowl’s sides. This action incorporates air and prevents large ice crystals from forming, resulting in a smooth, creamy texture.
Allow the maker to churn for approximately 20-30 minutes. The exact time will vary depending on your recipe, the ambient temperature, and how well the bowl was pre-chilled. You’ll notice the mixture gradually thickening. Listen for a change in the motor’s sound – it will become more labored as the ice cream reaches its desired consistency.
If you desire to add mix-ins, now is the time! Use the designated opening in the lid to gently incorporate your favorites during the last few minutes of churning. Once the ice cream has reached a soft-serve consistency, turn off the machine and enjoy immediately, or transfer to a freezer for a firmer texture.

Troubleshooting Common Issues
Encountering problems? This section addresses typical concerns like the maker not powering on, or ice cream failing to freeze, offering solutions for a smooth experience.
Maker Not Turning On
If your Nostalgia Ice Cream Maker isn’t powering on, several factors could be at play. First, ensure the unit is properly plugged into a functioning electrical outlet. Test the outlet with another device to confirm it’s delivering power. Next, check the power cord itself for any visible damage – frays, cuts, or exposed wires. A damaged cord needs immediate replacement.
If the cord and outlet are fine, investigate the unit’s internal fuse (if applicable – consult your specific model’s diagrams). A blown fuse will prevent operation. For TeamCity build agents running as a service, try running the agent under a regular user account possessing administrative privileges. This can resolve permission-related issues.
Consider if the maker has an on/off switch; verify it’s in the ‘on’ position. If the problem persists, and you’ve ruled out basic power issues, it might indicate an internal component failure requiring professional repair or replacement. Remember to always prioritize safety when troubleshooting electrical appliances.
Ice Cream Not Freezing
Experiencing an ice cream maker that isn’t freezing? The most common culprit is insufficient chilling of the bowl. Ensure the bowl has been thoroughly frozen for the recommended duration – typically 24 hours, or as specified in your model’s instructions. Verify the freezer temperature is cold enough; ideally below 0°F (-18°C).
Another factor is the ice cream base itself. The mixture needs to be adequately chilled before pouring it into the maker. A warm base will significantly hinder the freezing process. Also, confirm you’re using the correct ratio of ingredients; too much liquid can prevent proper freezing.
If using a GitHub App Connection, ensure the token possesses permissions to all necessary submodules. Generating a new token can resolve authentication issues. Finally, check the maker’s motor; a weak motor may struggle to churn effectively, impacting freezing.
Addressing Permission Errors (Related to Build Agents/Servers)
Encountering permission issues when integrating with build agents or servers? This often arises when the TeamCity build agent lacks the necessary access rights to the required directories or files. If the agent runs as a service, try executing it under a regular user account possessing administrative privileges. This can circumvent restrictions imposed by the service account.
Specifically, investigate the permissions of the ‘tmp’ directory within the BuildAgent directory on the server. Incorrect permissions here can prevent the agent from functioning correctly. Listing the directory’s files and permissions will help identify any discrepancies.
For GitHub App Connections, verify the token has comprehensive permissions, including access to all submodules. Generating a fresh token can resolve authentication failures. If you’ve added a private key, ensure it’s accessible to the user running TeamCity on the server, not just the agent machine.
Maintenance and Cleaning
Keep your Nostalgia Ice Cream Maker in top condition! Proper disassembly, cleaning procedures, and storage are essential for longevity and ensuring delicious results every time.
Disassembling for Cleaning
Before initiating the cleaning process, ensure the ice cream maker is completely unplugged from the power outlet. This is a crucial safety precaution to prevent accidental activation during disassembly. Begin by carefully removing the dasher assembly – the paddle-like component responsible for churning – from the freezing canister. Gently lift it straight up and out.
Next, detach any other removable parts, such as the lid or outer bucket, depending on your specific Nostalgia model. Refer to the diagrams in this manual for precise instructions tailored to your machine. Pay attention to how the components fit together; taking a quick photo during disassembly can be helpful for reassembly later.
Once disassembled, inspect each part for any remaining ice cream residue. Stubborn bits can be loosened with a soft brush or scraper. Avoid using abrasive cleaners or scouring pads, as these can damage the surfaces. Remember to separate all components before proceeding to the cleaning stage, ensuring a thorough and hygienic cleaning experience.
Proper Cleaning Procedures
Wash all removable parts – the dasher, canister, lid, and bucket – in warm, soapy water after each use. Mild dish soap is recommended; avoid harsh detergents or abrasive cleaners that could scratch the surfaces. Use a soft sponge or cloth to gently scrub away any remaining ice cream residue. Rinse thoroughly under clean, running water, ensuring all soap is removed.
The freezing canister often requires special care. Do not immerse the canister in water unless specifically stated in your model’s instructions. Instead, wipe it clean with a damp cloth. For stubborn residue, a paste of baking soda and water can be gently applied.
Dry all components completely before reassembling and storing. This prevents mold and mildew growth. The exterior of the ice cream maker can be wiped down with a damp cloth. Never submerge the motor base in water. Ensure all parts are fully dry to maintain the longevity and performance of your Nostalgia ice cream maker.
Storage Instructions
Before storing your Nostalgia Ice Cream Maker, ensure all components are completely dry. This prevents mold and mildew, extending the life of your appliance. Store the unit in a cool, dry place, away from direct sunlight and extreme temperatures. A pantry or cupboard is ideal.
The freezing canister should be stored separately, preferably wrapped in a protective material to prevent scratches or dents. Avoid stacking heavy items on top of the canister. The motor base should be stored upright to prevent any potential internal damage.
Keep all parts together for easy access when you’re ready to make your next batch of delicious ice cream! It’s helpful to store the dasher and lid inside the bucket to keep everything organized. Regularly check the storage area for any signs of moisture or pests. Proper storage ensures your ice cream maker remains in excellent condition for years of sweet enjoyment.
Advanced Techniques & Recipes
Unleash your creativity! Explore sorbet, frozen yogurt, and exciting flavor combinations. Experiment with mix-ins and adapt recipes to craft unique, personalized frozen treats.
Creating Sorbet and Frozen Yogurt
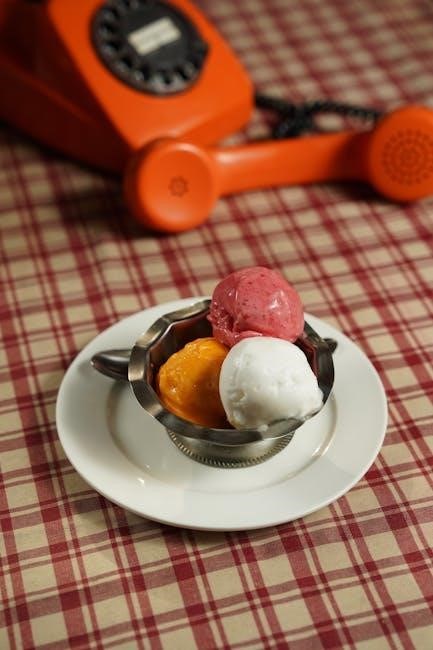
Expanding Beyond Ice Cream: The Nostalgia ice cream maker isn’t limited to traditional dairy-based ice cream. It’s wonderfully versatile, allowing you to craft refreshing sorbets and healthy frozen yogurts with ease. For vibrant sorbets, focus on fruit purees – think mango, raspberry, or lemon – combined with a simple syrup. Adjust the sugar level to balance the fruit’s natural tartness.
Frozen Yogurt Fundamentals: To create frozen yogurt, substitute the cream in a standard ice cream recipe with yogurt. Greek yogurt provides a thicker, tangier result, while regular yogurt yields a lighter texture. A touch of honey or maple syrup can enhance the sweetness. Remember that yogurt-based mixtures tend to freeze harder than ice cream, so consider adding a stabilizer like cornstarch or a tablespoon of vodka (the alcohol won’t freeze and will keep the texture smoother).
Churning Considerations: Sorbet mixtures generally churn faster than ice cream, so monitor the process closely. Frozen yogurt may require a slightly longer churning time to achieve the desired consistency. Don’t be afraid to experiment with different fruit combinations and yogurt types to discover your perfect frozen treat!
Experimenting with Flavors
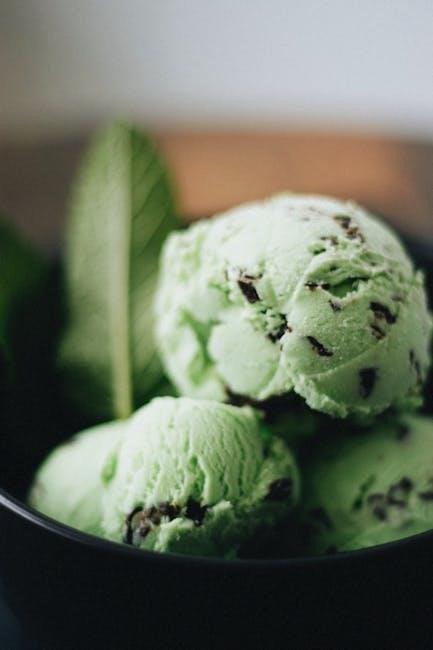
Unleash Your Inner Ice Cream Artisan: The beauty of a home ice cream maker lies in the freedom to explore endless flavor possibilities! Don’t limit yourself to classic vanilla or chocolate. Infuse your creations with unique ingredients to personalize every scoop. Consider adding extracts like almond, peppermint, or rum for a subtle aromatic boost.
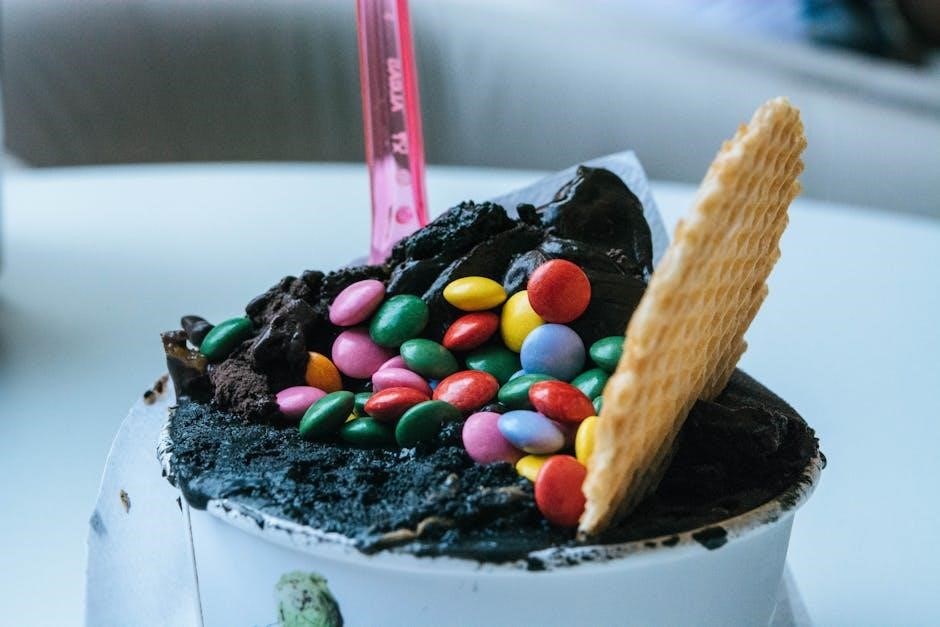
Mix-Ins & More: Incorporate chunky mix-ins during the last few minutes of churning. Crushed cookies, chopped nuts, chocolate chips, or even swirls of fruit jam can elevate your ice cream to gourmet status. For a sophisticated touch, try adding a pinch of sea salt to enhance the sweetness.
Beyond the Basics: Explore savory-sweet combinations like lavender-honey or rosemary-peach. Don’t hesitate to experiment with spices like cinnamon, cardamom, or chili powder for a warming kick. Remember to taste-test your base before churning and adjust the sweetness or flavorings as needed. Have fun and let your imagination run wild – the only limit is your creativity!

GitHub App Connection Troubleshooting (Token Permissions)
Resolving Authentication Issues: If your TeamCity build agent encounters issues authenticating with GitHub via a GitHub App Connection, the most common culprit is insufficient token permissions. Ensure the generated token possesses all necessary permissions to access the required submodules within your repository.
Token Regeneration: Begin by generating a new token for your GitHub App Connection. Carefully review the permission scopes during token creation, granting access to all relevant resources. Specifically, verify permissions for read access to repositories, contents, and pull requests.
User Account Verification: Confirm the GitHub App is correctly configured and linked to the appropriate user account within TeamCity. Double-check that the connection settings accurately reflect your GitHub organization and repository details. If problems persist, consider temporarily simplifying your build configuration to isolate the authentication issue.